17 Nov Using Lightspeed
Lightspeed (formerly known as Kounta) is the most common POS system used alongside iBe for taking orders, managing products, and for reporting how many sales you’ve done. When you sign up for iBe, you will also be signed up for a ‘Lite’ account of Lightspeed, which allows you to take orders through iBe. If you quite like the look of Lightspeed, and wish to use it to replace your entire POS system, let the iBe team know, and they’ll be happy to go over a few options with you.
You can login to your lightspeed account at the link below, or by downloadling the ‘Lightspeed Kounta POS’ app on the App Store and Google Play store. You will have been given Lightspeed login details when you were trained. If you don’t know your details, please email support@ibeloyalty.co.uk who will be happy to assist in finding your details.
my.kounta.com/login
Getting to the POS
The POS is how you take orders through iBe. To get to the POS, you need to first access Lightspeed. This is done differently on different devices, however. We recommend using an Apple iPad to operate your POS from, but here is how to access Lightspeed from all different devices:
- iPhones, iPads, iPods: Download ‘Lightspeed Kounta POS’ App
- Android Phones, Android Tablets: Download ‘Lightspeed Kounta POS’ App
- On a PC/Mac: Go to my.kounta.com/login
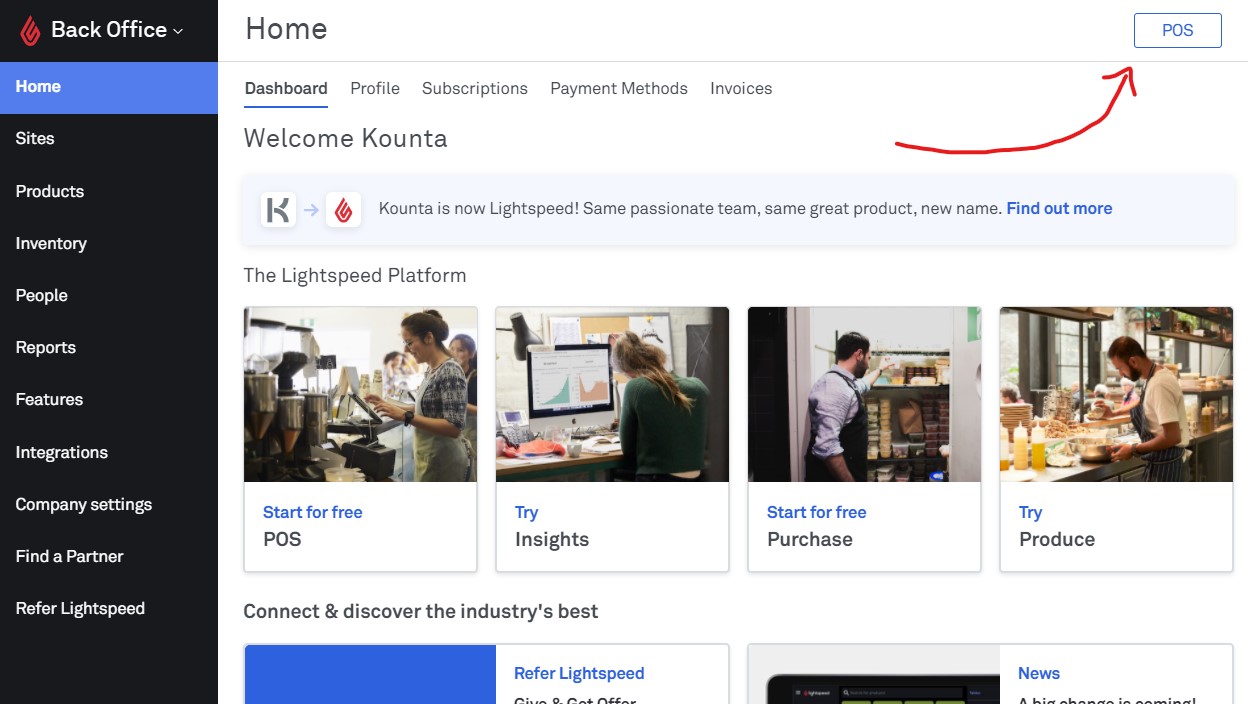
Once logged in to the back office on whichever device you are using, press the ‘POS’ button in the top right (shown below). On mobile and tablet devices, if you’ve logged in before, you’ll have the option to go straight to the POS, which is the quickest route.

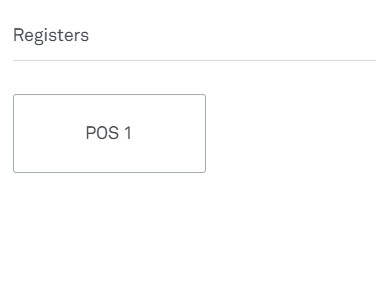
Pressing the POS button will take you to a screen to select which POS you with to assign your device to. With the lite account of Lightspeed, you only get 1 POS to allocate, so there should only be one option to choose from (shown below). Click the available option in the Registers menu, and your device will download all the necessary info and take you to the POS screen.

Press this to assign your device as a POS
What if the available POS icons are greyed out?
If the POS icons are greyed out, this means the device has already been assigned to another device. You are able to ‘Recycle’ the POS, however, which unlinks the device paired to the POS, and allows you to assign another device to it.
You can do this quickly by simply clicking on the greyed out icon, and you will be prompted to un-assign the register and re-assign it to the device you’re currently using.
Alternatively, you can do this from the back office ahead of time if you know you’re due to use a new device in future. To get to the POS settings to ‘Recycle’ the device:
- From the Lightspeed Back Office, go to My Site > ‘Devices’ tab along the top > Click the cog next to the device you wish to recycle
- From the POS selection screen, click ‘Manage Registers’ on the right, and click the cog on the the device you wish to recycle
Once in the settings, click the ‘Unassign Register’ button (shown below). This will kick the other device off that POS, and allow you to register another device to it.

Once you’ve unassigned the register, you are then able to press the ‘POS’ button in the top right, find the available POS to assign to, and get to the POS screen, ready to accept orders.


Sorry, the comment form is closed at this time.