01 Oct Adding Products to iBe
Jump to:
Syncing Products to iBe
Important Note: If you add/remove any products from the Lightspeed back office, or even change a description or price, ensure you sync both iBe and your Lightspeed POS. If Lightspeed and iBe don’t “match”, customers will have difficulties ordering. They will either get an error on their app, preventing them from putting an order through, or you will get an error on the Lightspeed POS showing “Unidentified Item”.
Adding Products to iBe is done by doing a ‘Till Provider Sync‘ (pictured below). This pulls information from your connected till provider (usually Lightspeed), and will add new products not pulled through previously, and update information on existing products, if they’ve been changed on your POS system.
A sync will pull through the following information:
- New Products
- Updated Prices/Descriptions
- Updated Category changes
- Updated Option Sets
- New/Updated Product Images
- New/Updated Location Info (images, opening times etc)

As each POS system is different, please refer to your POS system’s guides on how to add a product to your system. Once the product has been added there and a sync has been completed on iBe, the product will appear on iBe.
Once a product is in iBe, there are a few ways to get rid of them and stop them from showing on your product list:
- Deleting the product from your POS and doing a sync
- Disabling the product from the iBe Dashboard
The first option is best suited for mass-deleting products from the system, whereas the second option is best suited for when products go out of stock mid-service and need to be quickly removed.
(Note: syncing to remove products en masse is not recommended during service, as this can interfere with customers placing orders)
Adding Products in Lightspeed
If you wish to add new products to iBe from the Lightspeed POS system (previously known as Kounta), you will need to create these products in the Lightspeed ‘Back Office’, and then sync them to iBe from the iBe dashboard. You will have been given your logins for this in the setup stages of your app. Please email support@ibeloyalty.co.uk if you can’t locate your login details.
The Lightspeed dashboard is available from https://my.kounta.com/login
Once logged in, navigate to ‘Products’ in the left-hand menu (pictured below), and you’ll be able to add all of your products from there. See below for instruction on how to add each type of product.

Adding Simple Products
To add a simple product (e.g One Brownie @ £2.30), you can do this by pressing the ‘Add Product’ button on the Products tab in the Lightspeed Back Office. Upon pressing this button, a dropdown will appear (shown below) that will allow you to quickly add a product.

– ‘Add New Product’ box
This is where you will add the name of the product. Remember to use capitals properly, as this is the name displayed to the customer!
– Add Category
This is the category in which the product will appear. Tick the boxes in the dropdown to apply one or more categories to the product
- If the category you want doesn’t exist yet, start typing the category name you want, and you’ll be presented with the option to save that as a new category
- If you don’t add a category, the product will still be saved into the system for later use, it just won’t appear on iBe until a category is assigned
– Sales Price
This is the price the product will be sold at including any tax you select in the next box
– Select Sales Tax
This is the tax applied to the product.
- If the tax you require is not present, please let us know at support@ibeloyalty.co.uk
Once you’ve entered all the information, press ‘Add Product’ to quickly add the product. this keeps the dropdown menu there so you can quickly add another product.
Press ‘Save and Edit Product’ to save the product and go straight to the product details page, where you can add images, descriptions and more (explained below).
Adding Images
To add an image to your products, you can do this from the Product Details page. You can get to this page by:
- Pressing ‘Save and edit product’ when adding a product
- Clicking the cog icon on the right hand side of the product when viewing them on the Products tab
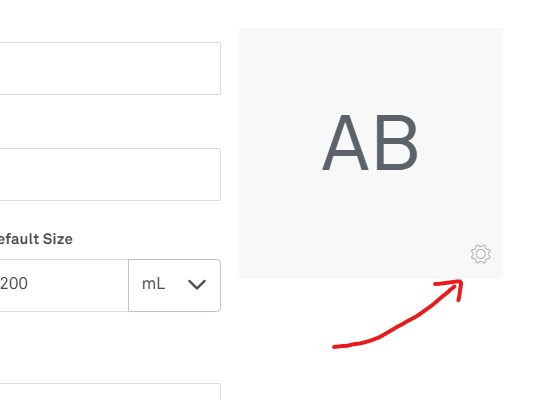
To add your image onto the product, press the cog icon shown in the image when on the Product Details page. This will open your file browser on the device you’re using, and allow you to select an image to upload.
Once uploaded, remember to press ‘Save’ at the bottom of the page!
Please ensure you follow our Brand Guidelines when adding in images. In short, the pictures have to be appropriate, look professional, and show the product off really well when shown as a small icon next to the product, and as a larger banner when the product is clicked on in iBe.
If you sync a product to iBe without adding in an image, a placeholder image will be shown in its place.
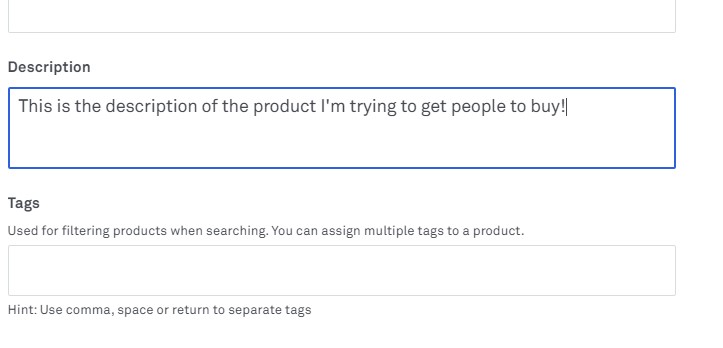
Adding Descriptions
To add a description to a product, you enter this in the ‘Description’ box in the Product Details page (shown below).
There isn’t technically a limit to the length of the descriptions you can enter, but we don’t recommend to have a description that is too long. A good rule to follow is that if you can read the entire description in the description box without scrolling, it’s a good length!
Once entered, remember to press ‘Save’ at the bottom of the page!
(Note: Any line breaks will not show as line breaks on iBe. If you put a line break in by pressing ‘enter’, iBe will ignore this and just put the content after the break as the next sentence in the description)
Sorry, the comment form is closed at this time.